Humans have been blessed with cognizance of our ability to move in different patterns, speeds, intensities, and with varying intentions. To ignore your body’s movement potential is to ignore one of the biggest gifts of life.
If we are going to move, why not practice efficient, fluid, and controlled motion? We can prevent many acute injuries and chronic pains by simply increasing quality of our movement. An example;
Patient describes an ache in their low back while performing daily activities (brushing their teeth, doing laundry, picking up their child).
A movement analysis shows the patient lacks awareness of how to utilize their hips while bending forward, resulting in increased loading of their low back.
Through several sessions, their rehab specialist teaches hinging concepts, increases available range of motion at involved joints, and strengthens corresponding muscles.
Patient leaves treatment with the tools necessary to reduce future stress on their low back, ultimately leading to a decreased reliance on medical providers, pain medications, or other palliative measures.
We love our patients, but your presence in clinic likely means something is not going well. Often, learning to move your body efficiently is THE BEST means of avoiding pain and injury.Â
Some words of wisdom from a master of movement, Ido Portal;
“Your existence is within a bodyâ€
“You are in a body, you must moveâ€
“You better learn how to move well, because it’s such a big part of your lifeâ€
The Power of Movement – The School of Greatness Podcast with Lewis Howes
Part 2 – What can affect the way you move?
Lack of exposure/knowledge
Lack of practice (effort?)
Strength
Injury or Chronic Pain
Lack of motion/mobility
Lack of coordination (motor control)
Â
Example – Progression of Parkinson’s with Exercise Prescription
In this series we’re aiming to highlight the treatment modalities Helix offers BEYOND traditional chiropractic adjustments. Today we dive into the how and why of IASTM!
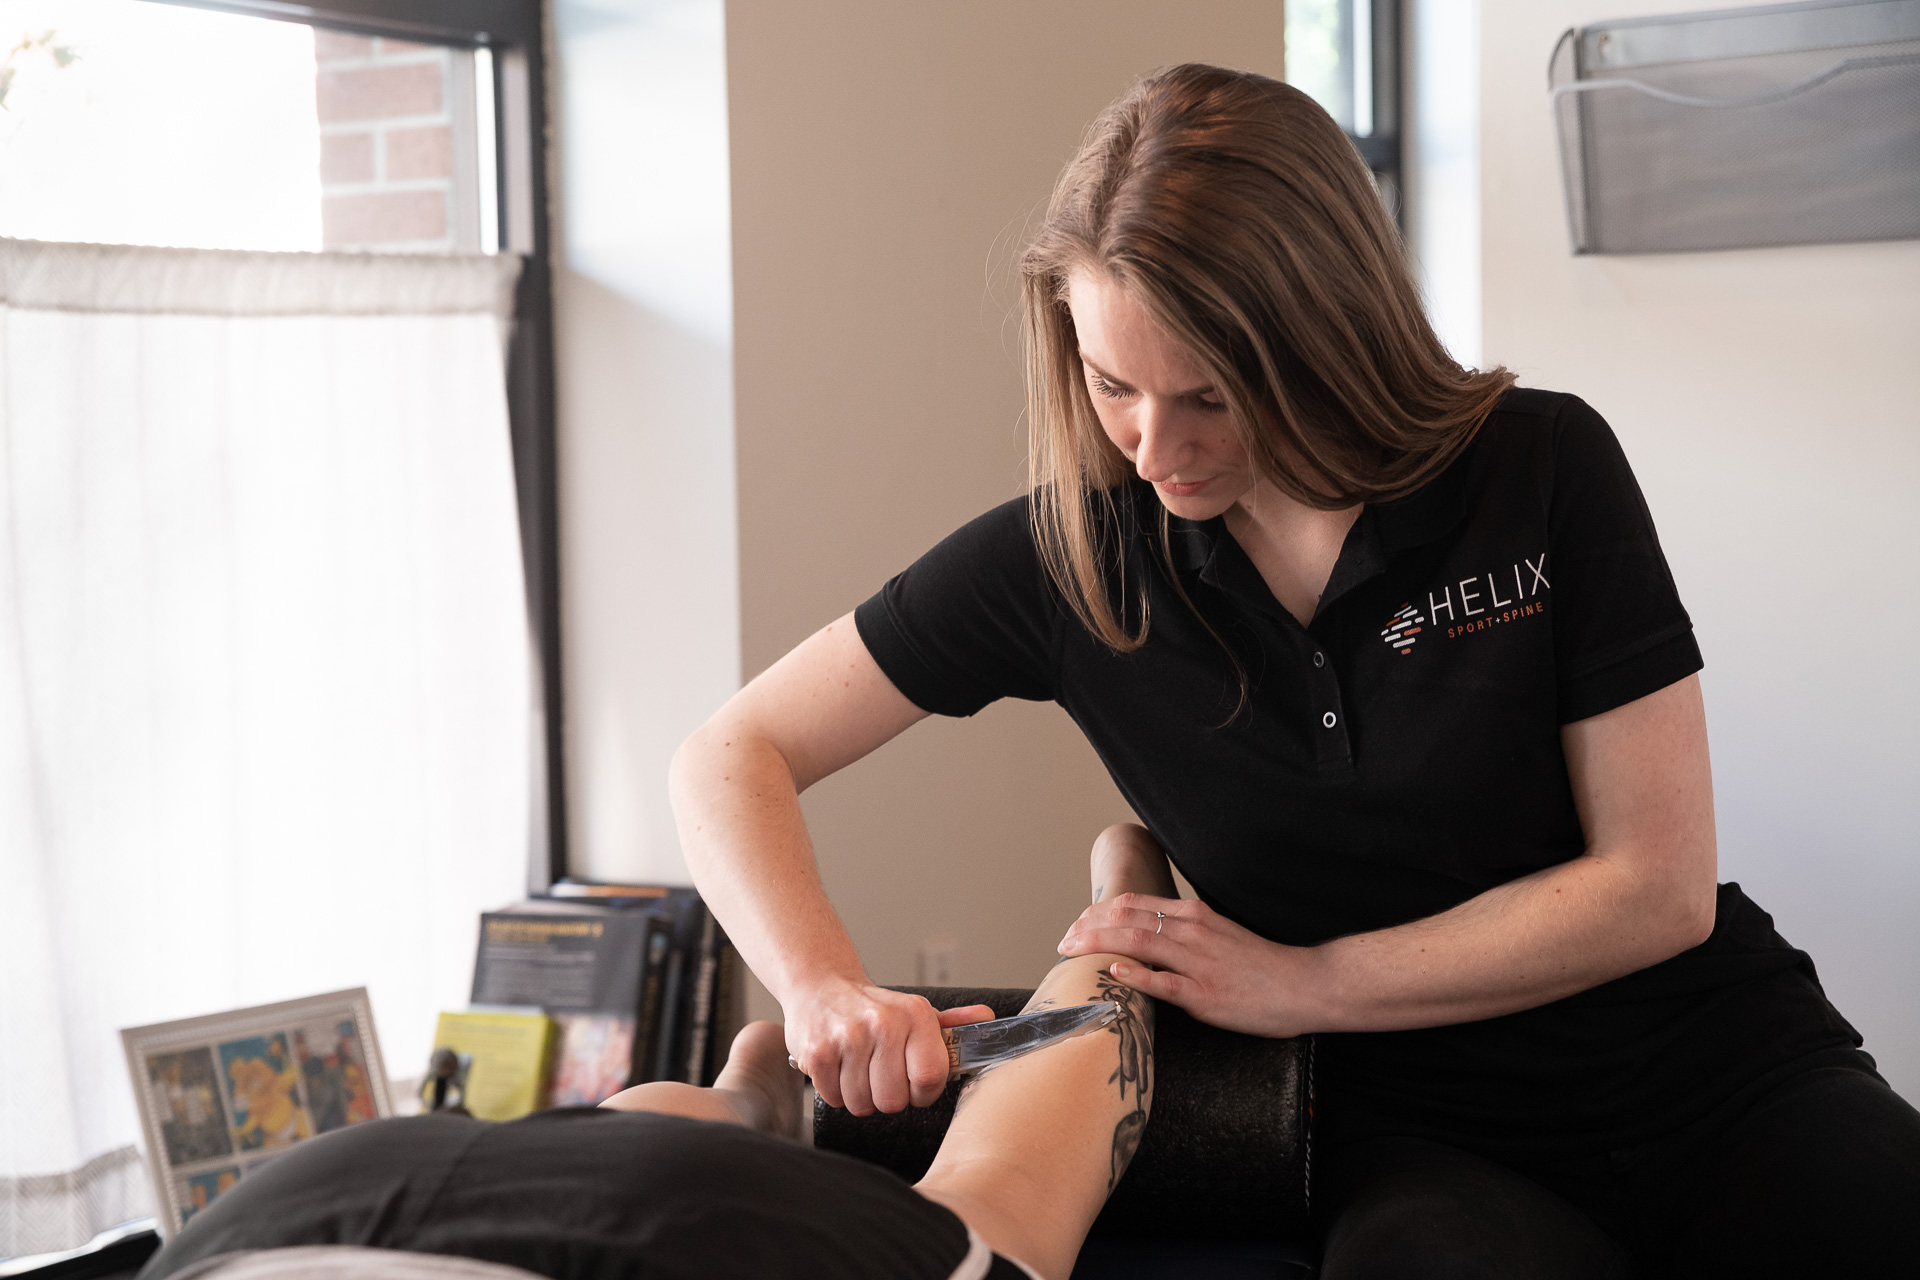
Instrument Assisted Soft Tissue Mobilization or IASTM is performed by sliding or “scraping†a tool on the skin in selected directions with varying degrees of pressure. This can be done to tissue that is stationary, moving, or even to a tissue that is under load/resistance.
IASTM can:
-Increase ROM by facilitating the movement of tissues
-Decrease swelling at a site of inflammation
-Reduce pain by decreasing sensitivity in an area of the skin
When would a Helix chiropractor utilize IASTM?
Let’s say your favorite method of exercise requires you to repeatedly reach your arm overhead, but in doing so you feel a pinch or sharp pain. During evaluation, your Helix chiropractor may identify a soft-tissue restriction limiting your ability to move into an overhead position, IASTM can subsequently be utilized to increase range of motion through the shoulder girdle.
Whether you are a climber, swimmer, or Olympic lifter, IASTM, along with corrective exercises, can prove beneficial in giving the athlete the shoulder mobility needed to functionally raise their hand over head and return to your favorite activity!
If you train on a consistent basis, chances are you’ve encountered some sort of tendon/ligament strain, sprain, or tear. Whether you’re a runner who struggles with Achilles pain, or a powerlifter dealing with tricep tendinopathy, connective tissue injuries can be frustrating, confusing, and challenging to rehab.
Outside of traditional soft-tissue therapy, rehabilitative exercise, and nutritional approaches, what else can we utilize to speed the body’s healing capabilities?
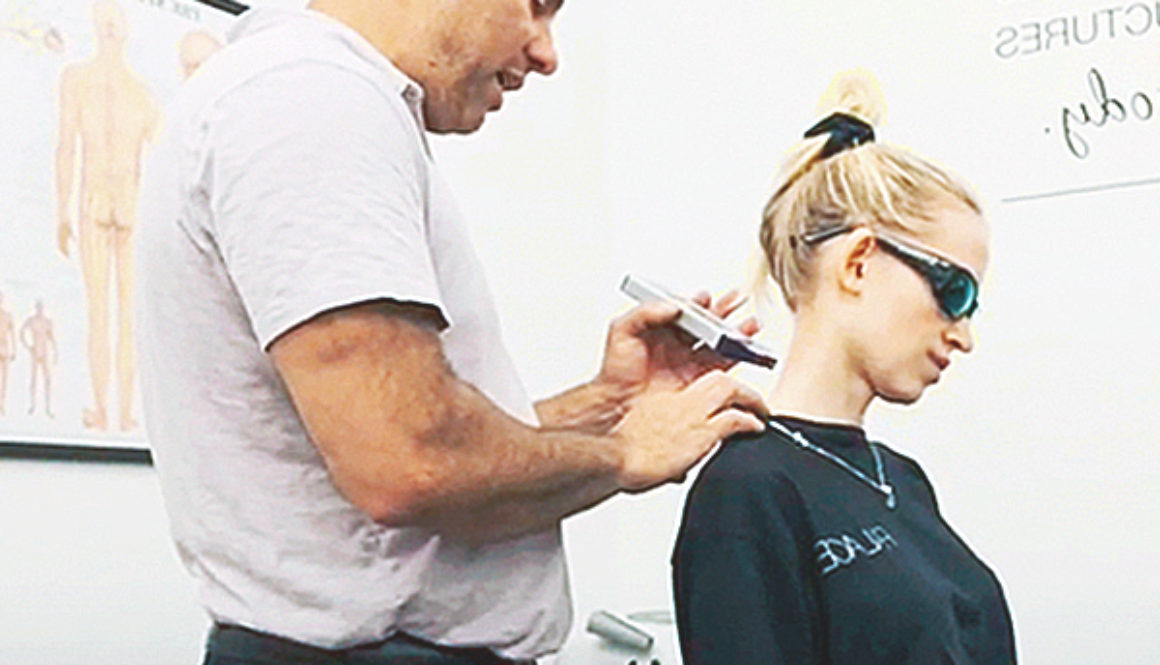
Laser therapy is an effective supplemental treatment to add to your plan of care. Utilizing light waves, research has demonstrated laser therapy can;
Stimulate ATP production – Increased energy supply within a cell to support healing of tissue
Increased circulation through vasodilation – Enhances delivery of oxygen and immune cells to healing tissue
Improve cellular maintenance by stimulating several “clean-up†and healing processes;
Phagocytosis – Ingestion of pathogens, bacteria, cellular debris
In layman’s terms, research shows that laser therapy can act to support and enhance the body’s natural healing processes, leading to shorter periods of recovery from injury or chronic pain. Ask your Helix provider whether laser therapy might be appropriate for you!
The word ‘electrolyte’ is thrown around liberally in the world of sports performance and nutritional supplementation, but what in fact are electrolytes and how do they affect our ability to move, compete, and enjoy the great outdoors?
Electrolytes are minerals that in solution form have the capability to conduct electricity. Their presence in the human body, via consumption of food and drink, facilitates the contraction and relaxation of muscle fibers through the nervous system. Athletes that excessively sweat due to prolonged physical activity (over 90 minutes) are suggested to supplement with electrolytes. Other circumstances necessitating supplementation may include multiple games/events within a short time span (tournaments), excessively hot/humid, or fluid loss due to fever, vomiting, or diarrhea.Â
The most common electrolytes found in sports nutritional supplementation are Sodium, Potassium, Magnesium and Calcium, ensuring these four minerals are balanced is a great starting point for increasing performance in the gym, pool, or on the field!Â
Magnesium – Can help to promote muscle relaxation and reduce cramping.Â
Sources: green leafy vegetables, nuts, beans, whole-grain cereals.Â
Deficiency (hyponatremia): nausea, headache, confusion and fatigue
Sports drinks are marketed as a source of electrolytes, but generally come with a staggeringly high level of sugar (one 32 oz Gatorade contains ~53 grams of sugar!). Try this homemade sports drink for an electrolyte boost without the sugar crash!
Home Sports Drink Recipe
¼ tsp. salt
¼ cup lemon juice
¼ cup honey
1 ½ cups unsweetened coconut water
2 cups cold water
Option: Powdered magnesium or calcium (based on bloodwork and recommendation from a medical doctor)
16-24 ounces per pound of bodyweight lost due to fluid loss
Â
Â
Thomas Howes Athletic Development Coach & Senior Rehabilitation Specialist
Do you consistently experience low back pain after a round of golf or session on the driving range? Utilize these three strategies to;
·     Improve mobility through the hips and thoracic spine
·     Gain neuromuscular control of your improved range of motion
·     Enhance your ability to produce force through the “foot to floor†concept
The golf swing is a complex and integrated skill that requires extensive coordination through the entire body. When we see a breakdown in motion/strength through specific regions, we tend to sacrifice the overall quality of the swing and increase our risk of pain and injury. Today we will focus on improving isolated motion through the hips and thoracic spine and learn to integrate these skills in a full-body exercise.
Concept 1: Unlock your Hips (Supine Banded Hip IR/ER)
·     Lie on back, band pulling laterally across body and looped around outside knee
·     Brace core, drive outside knee down/out slowly. Focus on contracting through the backside of the hip.
·     Maintain stable pelvis and aim for 3 second concentric, 3 second isometric hold, and 3 second eccentric. Perform reps to light fatigue, our goal is to maintain control rather than absolute fatigue.
·     Repeat on inside leg into internal rotation, driving the knee inward while maintaining a level pelvis.
Concept 2: Maximize Spinal Rotation and Control (Split Stance Trunk Rotation)
·     Standing in a spit stance, hinge forward while maintaining spinal position (minimize flexion or extension)
·     Slowly rotate your spine towards lead, don’t allow pelvis to rotate. Aim for the 3:3:3 tempo we utilized in drill #1.
·     Repeat into opposite direction, minimize collapse of knee or rotation of pelvis.
·     If you experience “sticky†points in your range, slow tempo down and work to develop control in this phase of motion.
Concept 3: Develop Force from your Feet (Med Ball Lateral Hop to Iso)
·     Stand on right food, 6-10 lb. medicine ball held in front of torso.
·     LOADING: Slowly chop the ball across your body as you load weight onto right leg. Notice the position of your right foot as you move deeper into the right hip.
·     ACCELERATION: Driving right foot down/out, push through right hip and jump to your left leg. Focus on landing softly with “quiet feetâ€, aiming to control your landing and hold 1-2 seconds.
·     Build speed on control! We prefer to see solid loading and landing mechanics before attempting fast or large reps.
·     This drill incorporates the hip and trunk rotation we previously isolated in drills 1 & 2, think about how each individual concept integrates into this last skill.
These drills, performed with control and intention, will help you begin to understand how individual joints affect the overall golf swing. With time, we are aiming to increase your active range of motion capabilities through improvements in motor control and strength. Ultimately, improvements should decrease stress on the lumbar spine, increase club speed, and create greater overall kinesthetic awareness. Happy swinging!Â
Â
Â
Â
Thomas Howes Athletic Development Coach & Senior Rehabilitation Specialist
Through a decade of coaching in the health/wellness industry, one question seems to be constant.Â
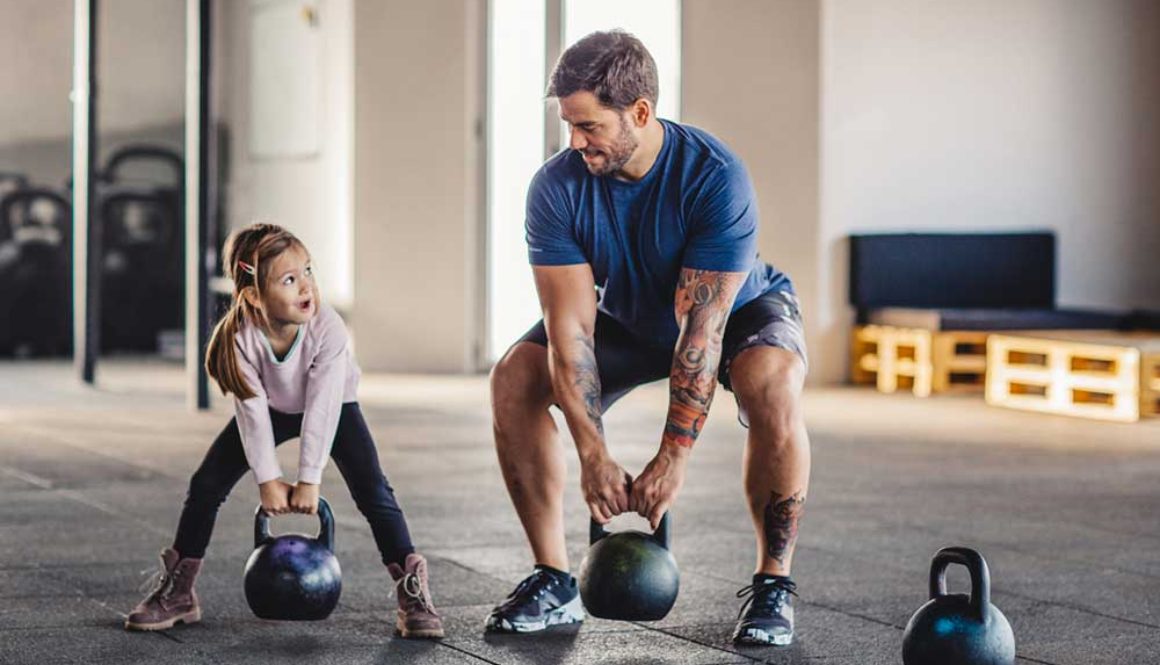
Is my child too young to participate in a weightlifting program?Â
In short, there are ways to appropriately challenge physical fitness AT ANY AGE, but the challenge MUST be specific and appropriate to the individual. Parents often worry about likelihood of injury, specifically to the epiphyseal growth plate of maturing bones. A 2009 research review (Faigenbaum et. al.) found that a majority of youth training injuries were a result of improper technique, hasty progression of load, and/or lack of qualified coaching supervision.
Â
This checklist will help you;
Identify what type of training is appropriate for your child and their needs
Identify their ideal training setting/facility
Begin the process of finding the right coach
Part 1: The Basics
Identify your Child’s Goals
Your child’s goals should play a major role in deciding the coach, style of training, and facility you decide upon. Is your athlete looking to increase speed, maximize strength, assist with mental wellness, aiming for weight-loss?Â
Is your child aiming to improve athletic performance? If so, what are the demands of their sport? Does the athlete have performance testing parameters they need to meet, if so, are you aware of which tests will be employed? Does your facility have the ability to create this sort of training environment?
What is the timeline prior to their start of their practice schedule and competitive season? How much time does the coach have to prep your athlete for their season? Ideally, a coach has AT LEAST 3 months for competitive preparation.
Physical Preparedness of your Child
Sedentary vs. Active Lifestyle:Â Programs should be modified to meet the individual. Throwing a sedentary child into a high-intensity training program is a great way to get your child hurt OR destroy their relationship with physical activity for the foreseeable future.Â
Experience:Â Similarly, placing a highly-skilled athlete into a novice training setting will hinder development of skill, strength, speed, and mindset.
Communication Style and Social Tendencies
Introvert vs. Extrovert: Your child’s success may be contingent on their preferred communication style and innate personality. Yes, placing your shy and introverted child into a group setting MAY help them “break out of their shellâ€, it may also backfire and end up pushing the individual away from fitness and health due to negative self-talk, feelings of ineptitude, or feeling aloof from the group.
Behavioral Challenges: I had an athlete in a group setting who continuously talked back, would not follow directions, and combatively isolated himself. Two weeks into our program, I was ready to kick the athlete out, as he was presenting a safety hazard to himself and others. At this point, I was informed that he had Asperger’s and social scenarios posed a significant challenge. His mother didn’t want to divulge this information in fear of her son being treated differently due to his diagnosis. While I understand (and support) her point of view, this information could have proved useful in my preparation for each session in regard to feedback tools and physical/environmental factors (location of athlete in relation to coach, what athletes are placed near the individual, volume of music, etc).
Hx of InjuryÂ
Does the individual have any injuries that need to be addressed with the coach prior to initiation of the program?
Some injuries may rule-out specific styles of training. Example, it would be highly inappropriate to program Olympic lifting or high volume of overhead lifting for athletes recovering from back injuries.
Coach may need to address stability/range of motion in reference to this injury
Coach may need to modify program to match the individual’s capabilities
Coach can use this information to decide what level of force or type of exercise is appropriate for the athlete.Â
Facility, Coaching, & Expectations
Setting: Would your child be more likely to succeed in a 1:1 or group setting? Does loud music and a high intensity environment affect their ability to concentrate? Does your child have friends that have similar goals and would be appropriate to pair with? Does your child have friends they should not be paired with due to inability to focus?
Coaching: Any coach can give you a “head in the trash can/can’t walk the next day†workout. Is your coach/trainer taking your goals into consideration when designing your child’s workout or simply trying to push you as hard as possible?Â
Educational Background: Credentials are not everything, I have met plenty of coaches with numerous “qualifications†that don’t take their job or their clients seriously. That being said, certifications indicate that an individual is invested in their trade and has exposed themselves to a multitude of approaches to training.Â
Specificity: A pilates instructor will not likely help your athlete increase their 40 time, likewise I haven’t met a plethora of bodybuilding coaches who understand the importance of joint mobility. Does your coach have a background in your sport or desired goals?
What are the Facilities Rules/Expectations?: I employ a “2-strike†rule for my athletes in group training settings. Once we have gone over the basics of each lift, I communicate that I trust all athletes to respect the principles of progressive loading (don’t go too heavy too quickly). If I dictate that an athlete is excessively loading their exercises on two or more occasions within a session, they will be asked to leave. I am aiming to instill trust and autonomy to my athletes, but will not accept unnecessary injuries as a result of poor judgment.
Your local Helix team is well connected in the Puget Sound fitness community and can likely provide you with referrals to gyms/coaches that match your needs. Stay tuned for Part Two, identifying specific safety guidelines and how to make sure training volume matches your child’s short and long-term goals!
Â
Â
Â
Thomas Howes Athletic Development Coach & Senior Rehabilitation Specialist
Doesn’t it feel like no matter how many years of effort you put into improving your golf game, you still somehow end up as an amature ?
Golf lessons and annoying playing partners who critique your swing aside, you could probably work on your golf game more than any other sport, and still come out behind. Almost no other sport can someone do so regularly, and still make little to no progress.Â
Have you ever met a mountain climber that just never could figure out how to get uphill? An outfield player who never got better at catching fly balls even though they tried every day? With most sports, as long as you put a little effort and energy into it, you can at least eventually claim the title of “not being terribleâ€. But not golf, because golf is hard.
And for those of us who care, and put unintentional practice in, we tend to groove bad habits more than good ones. We keep trying to fix things mid-swing with those bad habits, poor flexibility, and no way of really determining the actual needs of the swing.
So, what’s the point here?
The point is, that we should be focusing on the start of our golf game. The warm up. The beginning. The set up. The address before the address. Whatever your weakness is, this should be the first thing we are attacking if we want to improve. See a therapist if you’re injured or looking to improve hip motion, but incorporating the following four components into your warm up paired with the exercises we’ve listed alongside them, you’ll be on the right track to improving your golf game.
Component 1: Club head speed
Exercises: Medicine ball slams and kettlebell swings (this can be tricky on the course, consider carrying a tennis ball or deflated soccer ball with you).
Purpose: These dynamic moves will help to prime your body for the explosion of the golf swing.Â
Component 2: Flexibility
Exercises: Reverse lunge with thoracic rotations and box jumps into a squat
Purpose: More range of motion results in higher club head speed, fewer injuries, and a more diverse golf game
Component 3: Control
Exercises: Side jumps, med ball passes, and RDL’s
Purpose: Balancing the body is critical. You can’t shoot a cannon out of a canoe, so having a balanced base and power through all ranges of motion will really help develop consistency
Component 4: Stability
Exercises: Utilize a variety of plank or deadbug positions
Purpose: Learning how to brace the core will help with range of motion in the arms and the hips. It’s easier than stretching and you will connect your body in ways you didn’t know you could.
The good news is, the game of golf is more about muscle memory and mental preparedness than it is about athletic ability. Working on these four components can help make your game consistent, and reproducible.Â
Once you’ve gotten the beginning down, it’s always a good idea to seek out a coach or trainer so that they can help you with next level training or injury prevention.Â
If you want to take it to the next step and are looking for more specifics on how you can improve your golf swing, you can head over to our Instagram to check out the “Improve Your Golf Swing†series one of our rehab specialists created for our patients who love to golf.
Happy 2021 ! It is that time of year again when we all start to contemplate a New Year’s Resolution or “yearly goalâ€. This year might be starting off a little dark and dreary amidst a global Pandemic, but wanted to share 5 tips for keeping your motivation going this year!
1.START SMALL! Set a goal that is achievable and specific. Making small daily changes or changes gradually over the year are a lot easier to do than something radical and drastic to your regular every day life. It is okay to set phases for your goals, pro-athletes train in phases, why shouldn’t you do things in steps as well? Being specific is critical as well to make sure you know what your goal is clearly, “drink 100 oz of water a day†or you can even be specific with some room for variation such as, “30 minutes of exercise a day†or “one act of self-care a weekâ€
2.WRITE IT OUT! Make that goal visible to yourself every single day. A few perfect places we frequent every day might include the refrigerator door, bathroom mirror, background to your phone, in your car, work bag, and computer desktop. You could even get fancy and frame your goal. Your goal could be written out in words, a positive affirmation, a mindset, a single word, or even a symbol or picture. Having daily or weekly reminders to yourself on your phone or calendar may be helpful as well. The more you are able to see and think about your goal, the more you are reminded to stick to it.
3.SHARE & FIND FRIENDS! Once you have made up your mind tell your friends, family, dog, significant other, the neighbors, coworkers, just anyone you speak to regularly. The more people who know, the larger your support team will be. It may seem strange to reach out to people, but honestly do it, there are so many other people who would like outside help as well. You might be able to find an accountability buddy within your immediate circle, but if not, try virtual. Finding online groups can be extremely beneficial during this time of social distancing. Having someone to answer to on a regular basis, share progress/setbacks, and is working with you makes things seem a lot easier when you are not alone. If you still insist on being shy, try an app, there are plenty out there to help give you guidance for keeping you on track (click here for an article for goal apps).
4.SET YOURSELF UP FOR SUCCESS! I sometimes find this to be the most crucial part of staying on top of a goal. Plan, plan, and plan some more. The prep work is what makes the actual work a lot easier. Think about doing everything possible to put yourself in a good position for success. If you are working out in the morning, set your clothes out the night before, prep your coffee and food, get your equipment set up. If you are going to work on stress management, get a good night sleep, avoid doom scrolling, cut out the negative people in your life. Look at your schedule, plan things out and prepare for things ahead of time. Also, keep a plan B because we all know how well 2020 went to plan, things happen and be prepared to easily adapt to any changes in your plans.
As temperatures drop and the PNW begins to see flurries of snow, it’s time to get those legs into shape! Here are five tips to keep in mind for winter sports prep;
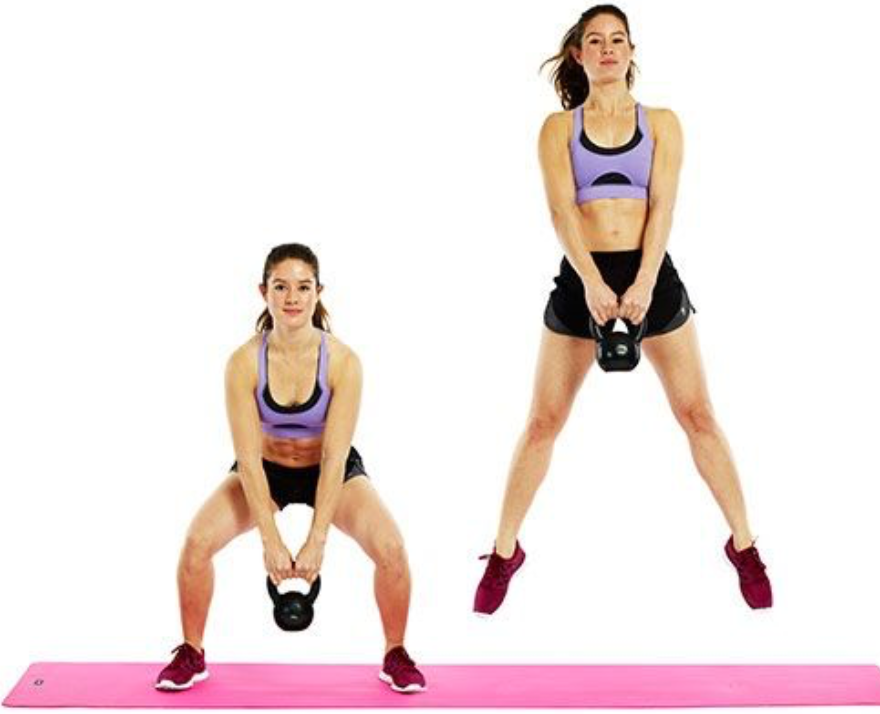
Learn to “Absorb the Floor†with Eccentrics – Snow conditions in the PNW can get choppy and induce faster rates of fatigue as the body has to constantly adjust to the surface of the snow. Introducing slow tempo eccentrics in your training will boost your body’s ability to tolerate these forces.
How to Perform: Introduce a 5:1 cadence to lower body exercises.
Example: Perform a goblet squat with a 5 second descent, pause at the bottom of your squat, and push explosively off the floor.
Static Holds for the Win – Ever traverse across a quarter mile of terrain at an awkward angle? Your legs will remember if you have. Introducing static holds will allow your body to make the necessary physiological changes to prep for these instances of fun!
How to Perform: Get into the bottom of a lower body lift and hold for 10-20 seconds while maintaining form, breathing cadence, and proper bracing.
Example: Get into a split stance with back heel elevated. Drop to the bottom of the movement and hold for 15 seconds, repeat until your legs hate you.
Plyos for the Adventurous – Do you enjoy straight-lining steeps or throwing your body off of manmade/natural terrain? Higher speeds and rough landings are going to incur higher levels of force on your body, incorporating plyometrics will prep your legs to be able to handle the load.
How to Perform: Incorporate rapid and “bouncy†movements that require your body to create maximum levels of force in a short period of time.
Example: Stand single leg on a 12†box. Jump laterally, landing on opposite leg and working to use hips to absorb the force of landing. Immediately spring back to the box, trying to minimize time spent on the floor.
Need a leg circuit to get your quads and glutes in shape for any condition? Check out the video below!
Don’t sleep on the lower leg: Although the foot/ankle are generally “fixed†inside of a boot, winter sports still place high levels of stress on the structures of the lower leg, especially when edging into a slope or on a deep pow day.
How to Perform: Incorporate plantar flexion or dorsiflexion into conventional exercises:
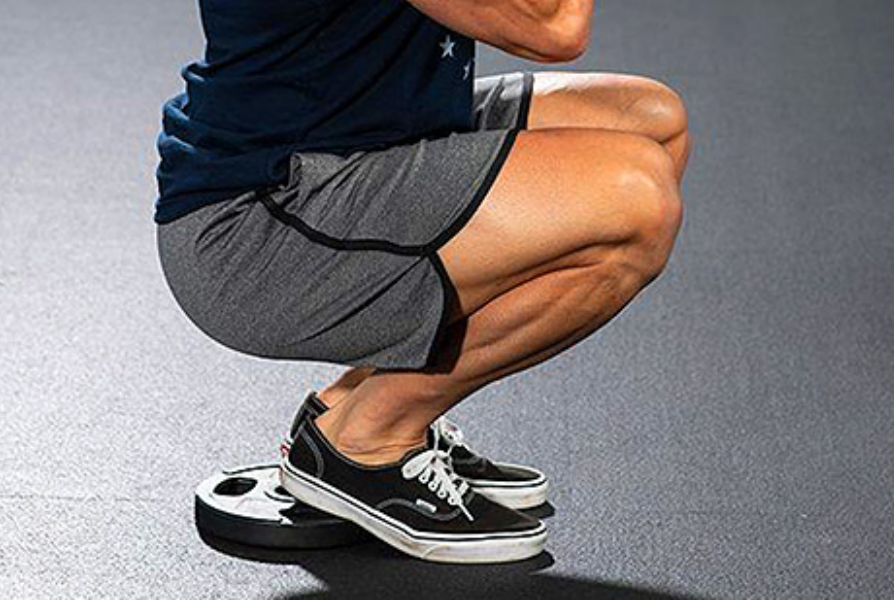
Example 1: Holding onto a TRX and with a pad under your heels, lift the forefoot off of the ground (goal is to feel the front of the shin begin to work). Drop into a squat while maintaining this lifted position of the ankle/foot.
Example 2: Holding onto two kettlebells, walk a length of 25-50’ while keeping your heels off of the ground. Aim to keep the pressure between the1st/2nd knuckle of the toes and minimize collapse onto the outside of the foot.
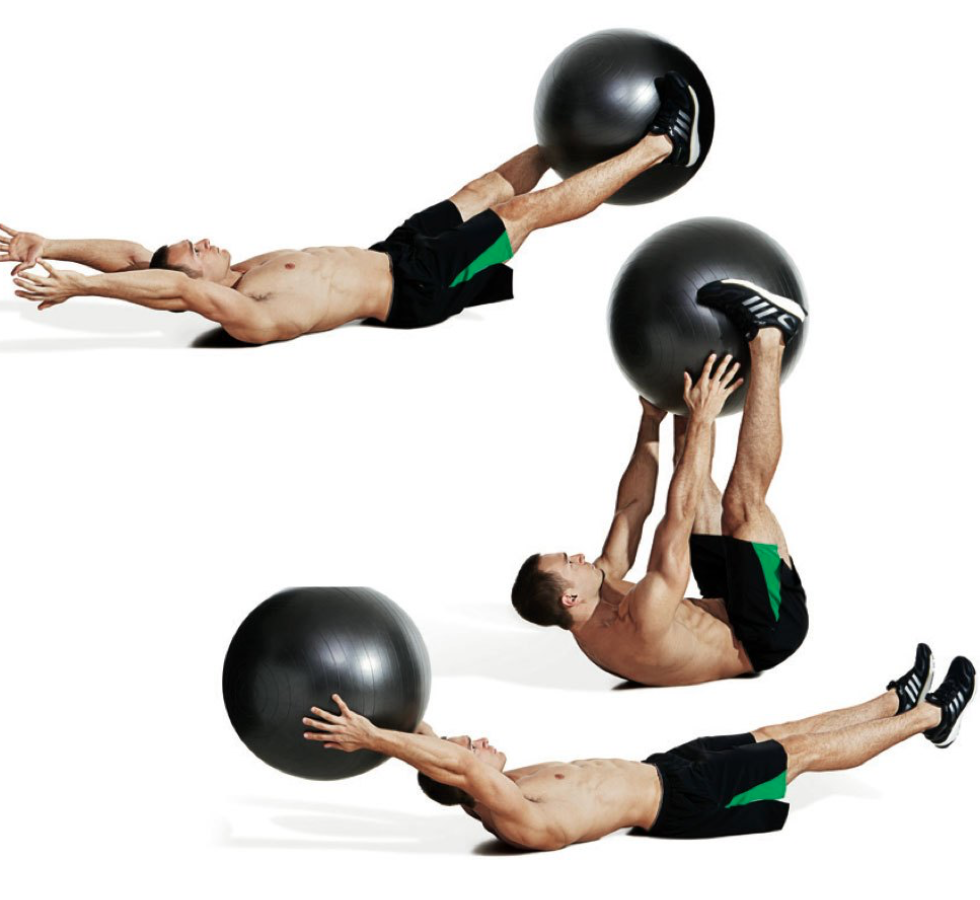
Diversify your Core Training: From making turns in deep snow to pushing yourself up after a tumble, the demands placed on the hips/trunk during winter sports are wide-ranging. Move outside of conventional sagittal plane exercises (crunches and front planks) to ensure you’re ready to conquer the slopes!
How to Perform: Utilize exercises in the frontal or transverse plane, or make things even more interesting by combining multiple planes in one movement!
Example: Set up in a side plank from either your knees or feet. With your top hand, grab a medium strength resistance band (anchored low) and drive the shoulder blade back to pull the hand to your side. The tension of the band will try to rotate your body and gravity is simultaneously trying to pull your hips down, your goal is to control your pelvis and spine as the shoulder girdle moves.
Knee Instability? Check out our video below to help strengthen specific muscles to protect your knees!
With many gyms around the country re-opening their doors, people are excited to get back into a fitness routine. While there are many positive benefits to consistent exercise (especially in the midst of a global pandemic), there are also potential obstacles when jumping back into training abruptly. Even the most self-motivated individuals who have maintained a home exercise program will likely experience deconditioning.
Some of the most common injuries when ramping up load and volume quickly are low back/core injuries. How do we mitigate the potential risk of these injuries? One important, but often under-utilized or unknown principle, when bracing the core involves engagement of the diaphragm. While this will not eliminate all deconditioning concerns, it may play a role in preventing core and low back injuries. The purpose of this article is to explain the multiple functions of the diaphragm, and how one can tap into it for stabilization of the core and low back.
Functions of the Diaphragm
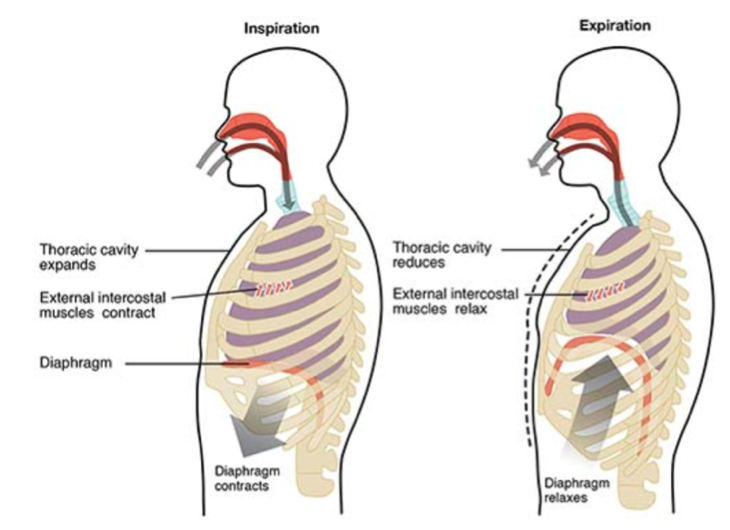
The diaphragm has two main functions, respiration and stabilization. These functions can be performed independently or in conjunction. In daily breathing strategy the primary function is respiration. When performing physical activity which requires core bracing or the moving of a load, some crossover effect of both respiration and stability can occur. As the physical requirements of a movement pattern or need to manipulate heavier load increase, so does the need for greater core stability.
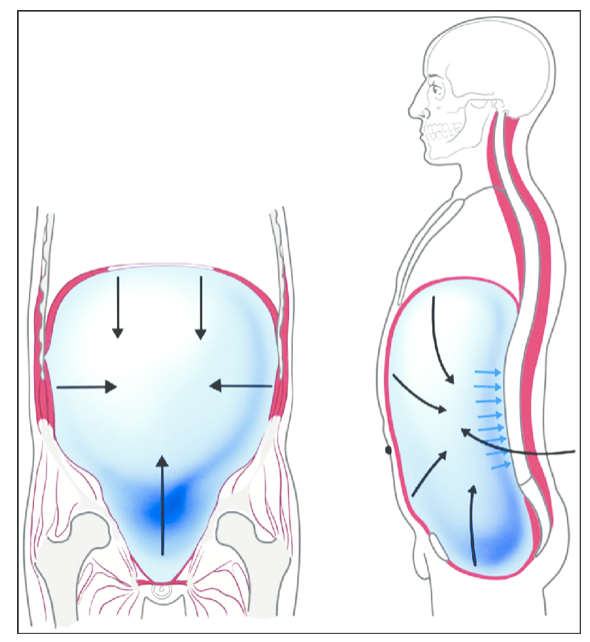
When breathing as nature intended the diaphragm should be the primary muscle activated. In a functional breathing pattern, the diaphragm flattens, allowing the lower ribcage to expand and the lower aspect of the lungs to fill with air. Think of this as our daily breathing strategy as move through life. Naturally, there is an increase in abdominal pressure, but at this point the breath and diaphragm are doing the majority of the work.
If the physical demand for more stability presents itself, the diaphragm can be accessed for its second function. It will need assistance from several other core muscles to create greater intra-abdominal pressure (IAP). As mentioned, this pressure can be created with or without inspiration. The maneuver used to create this pressure involves expansion of the stomach, low back, and lower sides/ribcage while simultaneously bearing down.
Intra-Abdominal Pressure Breathing
For the sake of this article, we will elaborate more on the combined functions for stability, also known as IAP breathing. You may be wondering how the creation of more pressure within the abdomen helps support the core and spine at all?
When the core muscles actively expand with the diaphragm engaged properly, we can use air filling the abdominal cavity to our advantage in creating greater pressure internally. While bracing the muscles in this expanded position, we can use the pressure internally to push outwardly into the spine. The muscles surrounding the spine on the outside of the abdominal cavity are bearing down in the opposite direction, effectively sandwiching the spine and pelvis in a more anatomically neutral and stable position.
Now that you know more about benefits of breathing diaphragmatically and using intra-abdominal pressure for core bracing, it’s time to apply it! Try the practice below as a starting point.
PRACTICE:
Diaphragmatic breathing
Lay down on your back in a comfortable position
Place one hand on your stomach and one hand on your chest
Breath through the nose, start to notice the breath
Focus your attention on breathing deep into the stomach, filling the waist line with air 360 degrees around into the side and low back
Let the breath do the work initially, on the breath in feel the stomach hand rise, feel the sides and lower ribcage expand laterally, feel the low back pressing into the floor, stop the breath in keeping the chest hand from rising
As you breath out, let the stomach fall back in
Once you have felt this breathing pattern for a couple minutes, transition into a more active expansion of the lower core using the IAP breathing
IAP breathing
Repeat the same steps as above
However, this time as you breath in, actively expand the stomach, lower sides and lower back outward as if filling a balloon
Stop the breath before the chest hand rises
Keep the expansion of your core muscles active even as you breath out and bear down
Practice maintaining the expansion of your core muscles as you cycle breaths in and out
Understand breathing in and out becomes more difficult when actively expanding and bracing
If you feel short of breath, light-headed, dizzy, then STOP, RELAX, take some normal breaths
Spend some time practicing this exercise laying on the back or stomach initially. After getting more comfortable, bring the exercise to seated position and eventually standing position as well. This can, and should, be applied to core stability exercises and lifting heavy loads. Understand, the maneuver will be more difficult in standing and loaded positions. With some focused practice initially and in gradually progressive positions, the goal is this becomes easier and more autonomic over time.